Wednesday, September 24, 2014

Spoons

Every since my kitchen update started here, I've been struggling with what to put on the walls.  It seems like whenever I try to decorate my walls, my scale is all wrong.  I need to go bigger.  I always think something looks big until I put it on the wall and then it's dwarfed.  So with the phrase rolling around in my head "GO BIG OR GO HOME" I started mad Pinteresting to find something for the big blank dining room wall.  Here's a before shot.


Holy moly that was a long time ago.  See what I mean about the scale?  The picture frame looked huge when it was sitting on the floor, but once I put it up.... it's Bilbo Baggins (Mom, that's a Hobbit movie reference, you won't get it).

Since I was already re-arranging things in the living room, I decided to steal my window chalkboard that was in the entry.  It left the entry empty, but I've got plans for that.  The window was big enough, but I still wanted to add a little pizzazz to the top.  Inspiration hit and I decided on wooden spoons.  Plain old regular size wooden spoons from TJ Maxx.  I didn't know if it would work, so I bought them with all intentions of not liking it and just throwing them in my spoon drawer.  After putting them up with my trusty Command Strips, I really liked them.


 I'm playing around with the idea of painting them, but for now I'm kind of digging the neutral vibe.  Here's a little pro (yeah right) Photoshopping to show what it may look like if I painted them fun colors.


I'm not sold.  Pretty sure I'm going to leave them neutral.

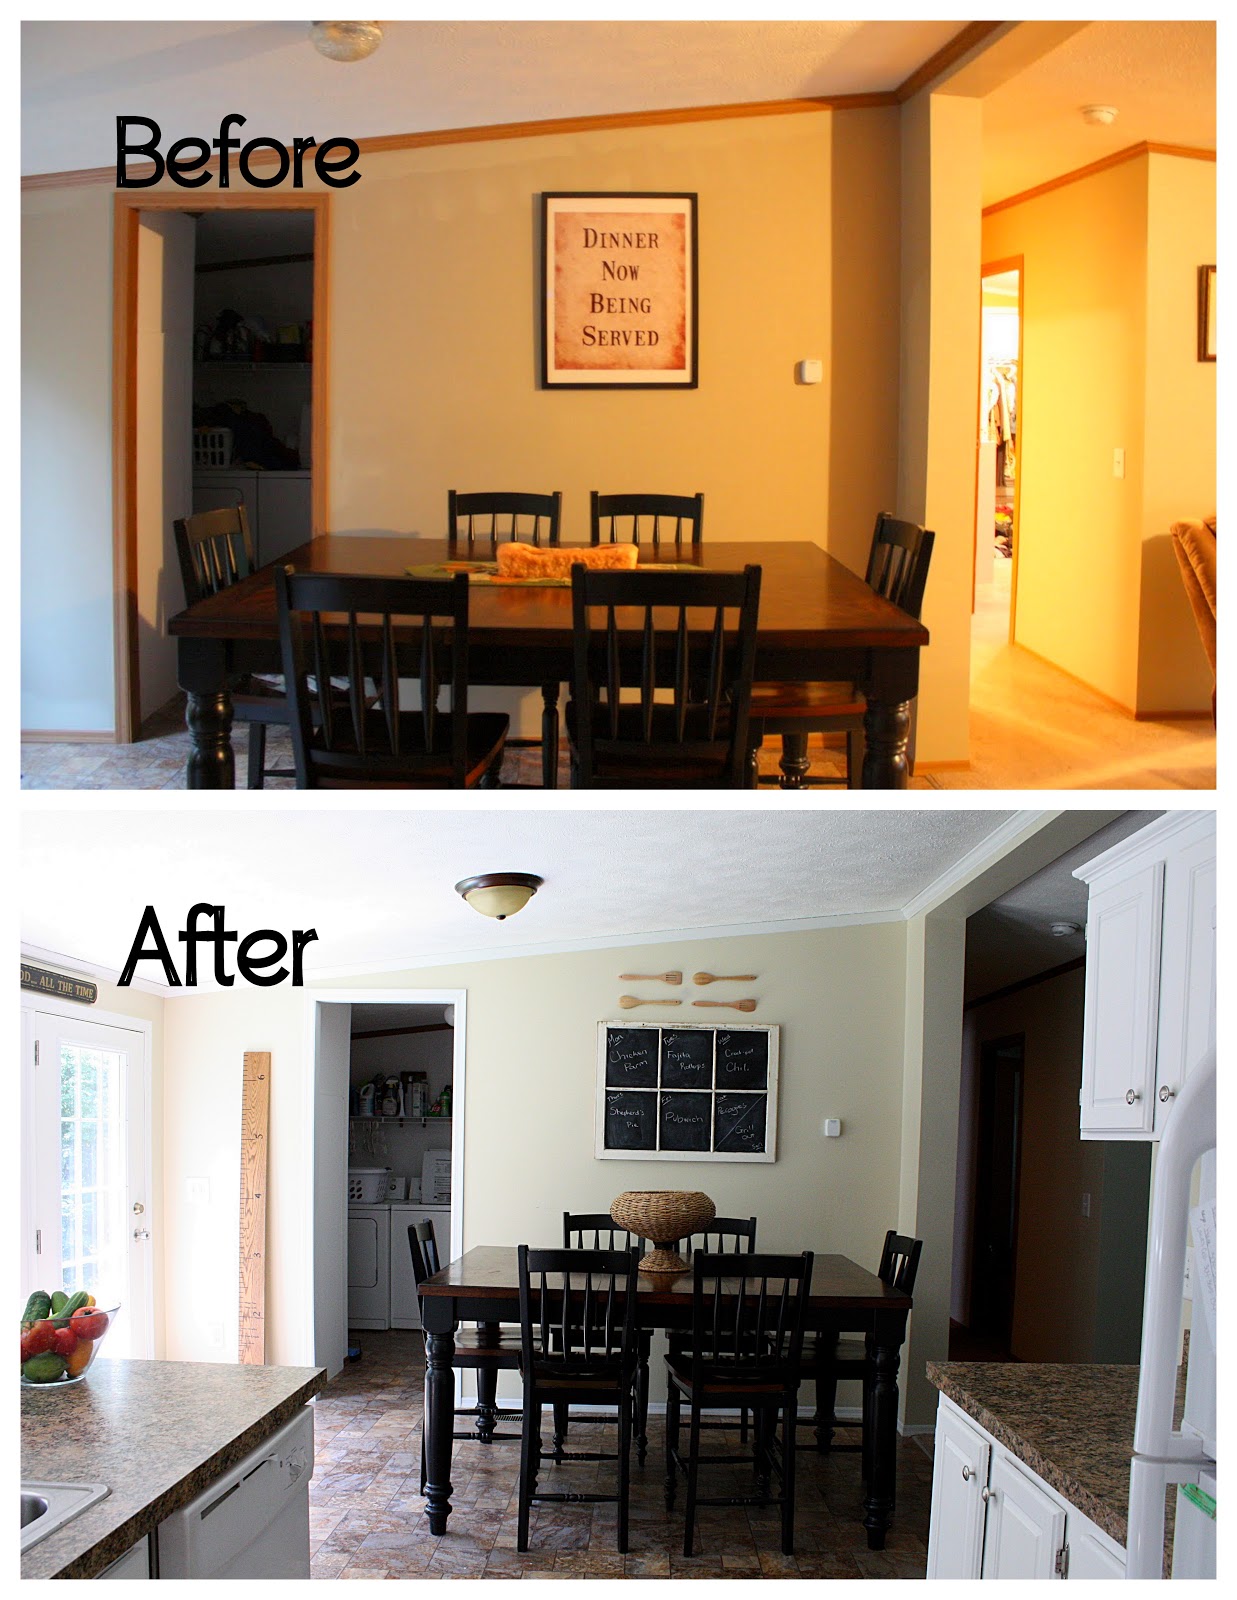
Here's a wide shot of the dining room side of the kitchen.


Here you can see the open space where there should be a door to the laundry room.  Yeah, that's a funny story I'll tell you at another time.  You can also see my DIY ruler growth chart that I'm waiting on my wonderful husband to hang.

It's amazing what some paint and new things on the wall can do for a room.


-Brooke

Tuesday, September 9, 2014

Big Girl

My baby girl turned 2 last Wednesday.  Excuse me while I go ugly cry in the corner.  I can't believe how fast these 2 years have gone.  It seems like just yesterday I was lying in the hospital and they put this itty bitty little thing on my chest.  She is so funny now.  She does things just to make us laugh.  A little while ago, we were driving by a playground and she said, "Mommy, a slide."  I really didn't want to stop at the moment, so I just nodded and kept driving.  She got frustrated and said, "Mommy!  My butt on that slide!!"  :):)  She makes me smile everyday.  I can be having the worst day ever and just a few minutes with her can turn the whole day around.  Now be overwhelmed with the cuteness to follow!  I'm going back to my party plans.  I'll share pics after the big Ice Cream Birthday Party next weekend.


Happy birthday Khloe!  

PS- you can read Khloe's birth story here.

Saturday, September 6, 2014

DIY Rustic Fall Wreath

Is it just me or have they started putting mums out WAY early this year?  Not that I mind, I love Fall.  I love the colors, the feel of the air turning crisp, the smell, the pumpkins.... you get the idea.  Also, what's up with this September?  It has been so HOT!  It's time to start cooling off... come on!

So, the Fall bug hit me early this year.  I've already broke out the pumpkin spice candles, started baking like a maniac and made a wreath.  I refuse to pay $40 for a wreath that I don't even really like, so I used what I had and made one that I love.


Here are my materials.


-foam circle (from Dollar Tree)
-sticks
-burlap
-raffia
-old t-shirt
-hot glue and gun

This was so simple to make.  It only took about 10 minutes.

First, I wrapped the foam circle in burlap, hot gluing the end to secure.  Then I broke the sticks to around the same length and stuck them in the foam all along the edges.  Most were pretty secure, but I hot glued any that felt loose.

I then made flowers out of the old t-shirt.  I roughly followed the tutorial here.


Hot glued the flowers on and hung with the raffia.  That's it!  Now I have a custom wreath that matches the rusticness (is that a word??) of my porch.


All in all, the wreath cost me $1.  I had everything except the foam circle.  Not bad, not bad at all.

-Brooke

Linking up to The 36th AVENUE.
The 36th Avenue

My blog has moved!

You should be automatically redirected in 6 seconds. If not, visit
www.lifeonagravelroad.com
and update your bookmarks.