Monday, March 17, 2014

Entry Table Re-Do

My entry table has lived many lives.  

When I was a teenager, mom and dad bought me a vanity for my room.  It was a little desk with a mirror attached that had picture frames attached to the side of the mirror.  I loved it.  I put all of my little perfume bottles on it and felt like an adult.  :)  I tried my best to find a picture of one similar online, but Bing wasn't my friend today.

When I got married I took it with me, but our bedroom was so small that I didn't have room for it.  So, instead, I removed the mirror and put it in our living room as a desk.  

Once we moved into this house, I used it as an entry table for a while, but then moved it to the family room to use as a desk.  With the desk Chris built for me last month, I was finally able to move it back to the living room as an entry table.

Here she is in all her glory.


I've had plans to re-do this table for a long time.  I really think a table this size has great potential for an entry table, but I wasn't feeling the 90's style of it.  Plus, the table had seen it's better days.  Here's a look at the top of it.... not so pretty.  


So I took her outside and broke out the palm sander.


Yep, that's the look of a crazed woman using a power tool!  #powertoolselfie (confession time, I have no clue what hash tags do or mean)


I sanded the whole thing down and was left with this.


Since I was planning on painting it, I wasn't worried about getting all of the stain off, I just needed to rough it up enough that the paint would stick.

There were some holes on the top where the mirror used to be connected, but some wood putty took care of it.


I wiped the whole thing down to remove dust and took it inside to paint.  (it was still a little cold for painting outside)

I used Valspar Ultra Paint + Primer in Ultra White with a semi-gloss finish.


One coat down...


After 4 coats, it was nice sparkly white.  But I wanted more.  So I decided to add stripes.  I measured the top and divided by 5 in order to get 5 stripes.  I taped it off and then painted every other stripe in Sherwin Williams Chopsticks that I had leftover from the walls in the hall, kitchen and family room.


Right about now the angels were singing and I was falling in love.  But I still needed more.  So I figured a little distressing was in order.  I took out some stain we had on hand and carefully rubbed a little on all of the edges, corners and very lightly down the legs and very, very lightly on the top.


When distressing, you want to be careful, but at the same time don't make it look too perfect.  Just have fun with it.

And finally, for the drawer handle.  I didn't want to buy anything, so I went digging through my supplies and came up with burlap.  I simply pushed the burlap into the holes on either side, leaving enough hanging out the front to make a handle and hot glued on the inside of the drawer.  I knew this drawer doesn't get used much.  if you have a heavily used drawer, you may want to staple it to secure it better.


And now for the afters!!  YAY!!


I LOVE it!!  And the best part?  It was free!!  I had all the materials I used!

My next project going to be something to hang above it.  

UPDATE- to see part 2 of this post, click here.

- Brooke

Thursday, March 13, 2014

Khloe's Play Kitchen :)

Ever since Khloe was born I've been all about starting traditions- mainly Christmas traditions.  I have things I remember from when I was little that we did ever year and Chris has the same from his childhood.  We've taken a few from each family and also added a few of our own to carry on with Khloe and future kiddos.  One of the things I wanted to do was make Khloe something homemade every year for Christmas.  I just want her to know as she gets older that we didn't just go to the store at the last minute and hurry and pick the last thing on the shelves.  I want her know that on at least one of her gifts, we put real effort into it and took time just thinking about her while we worked on it... It's gettin' cheesy 'round here... better just get to the DIY part...

Through the past year, Khloe has shown a real interest in cooking... even though she's just 1.  Every time I cook, she literally gets mad if she's not on my hip helping.  So, when we started thinking about what to make her for Christmas, the choice was clear... a play kitchen!!  I knew I wanted to make it out of a cabinet, so I went to the Habitat for Humanity Restore and picked up this little beauty for $5.


Oh yeah, she was a looker.  Plastic doors, missing handle, cobwebs... yep this little lady was the whole package, but she was begging for a makeover.  

We started by removing the doors and cleaning everything really well.  Then I sprayed it with Krylon Fusion spray paint in glossy white.  This paint boasts that it will bond to plastic, but it's also good for wood, metal, etc.  I sprayed everything white except for one door.  I went with silver on this door because it would eventually be her oven door.  Once everything was good and covered (it took around 3 coats of paint) I sprayed the whole thing with clear coat to help protect it. 


When Chris reattached the doors, he attached the left one back in it's original position, but he attached the right one at the bottom so it would open like an oven door.


To make the counter top, we bought a plain board from Lowe's.  Chris routed the edges so they weren't sharp or splintery.  He then cut a whole in the top for the faucet and the bowl for the sink (which was just a small mixing bowl).  


We really wanted the look of a real counter top, so we painted it with Rustoleum Stone textured spray paint in Pebble.  If you've never used this type of spray paint, let me just say- coolest.stuff.ever.  The first coat looks like you just splattered a few chucks of something on it, so I was a little worried.  But, as we put more and more coats on, it started filling in and it's just awesome.  After it was covered and dry, we put a coat of clear coat on this to give it a smoother feel. 


After it was all done, we glued the bowl for the sink in place and installed the faucet (without connecting water of course).  Then came time for the finishing touches.  

New handles.


Knobs for the stove.  I used small wooden disks from Michael's that I painted black and wrote on H, M and L on for High, Medium and Low.  Chris installed these loosely with a bolt and nut so she can easily turn them.


For the stove top, I bought a wooden plaque from the craft section at Walmart and sprayed it the same silver as the over door.  Then I added some painted details to it with black paint.  Chris glued it in place with wood glue.


A chalkboard on the side.


Add some cute kitchen accessories and we're finished!! 

We had it sitting in the family room on Christmas morning when she woke up ( I may or may not have been more excited than she was).  She loves it.  She plays with it every day and I know it's something she will continue to play with for years.


Since she's still a little shortcake, we have a step stool that she uses to play with it.

Later on I plan to add a shelf inside for more storage and I would love to actually cut out a square on the oven door and install some plexi-glass.  But for right now, it's finished :)


-Brooke

Sunday, March 2, 2014

Painting Trim & Making $16 Curtains

I've always loved white trim.  Chris has always loved wood trim.  When we built our house, I didn't realize that I liked white yet, so there was no argument, we just chose wood.  The problem with this wood trim is that it is very low quality builder's grade and the shade of wood is orangey brown.... not my cup of tea.  Chris really doesn't like this shade of wood either, but he prefers it over white.  We were at an impasse.

Finally we came to the conclusion that when he finished the basement (his man cave) he could choose whatever he wanted down there and I could make the upstairs however I wanted.  YAY!!  Well... the basement is finished!  I'll post about it at some point once I get some pictures.  Now that it's finished I've started painting all of the upstairs trim white.  I plan to top it all off by painting the kitchen cabinets white too, but even thinking about that project is daunting.  

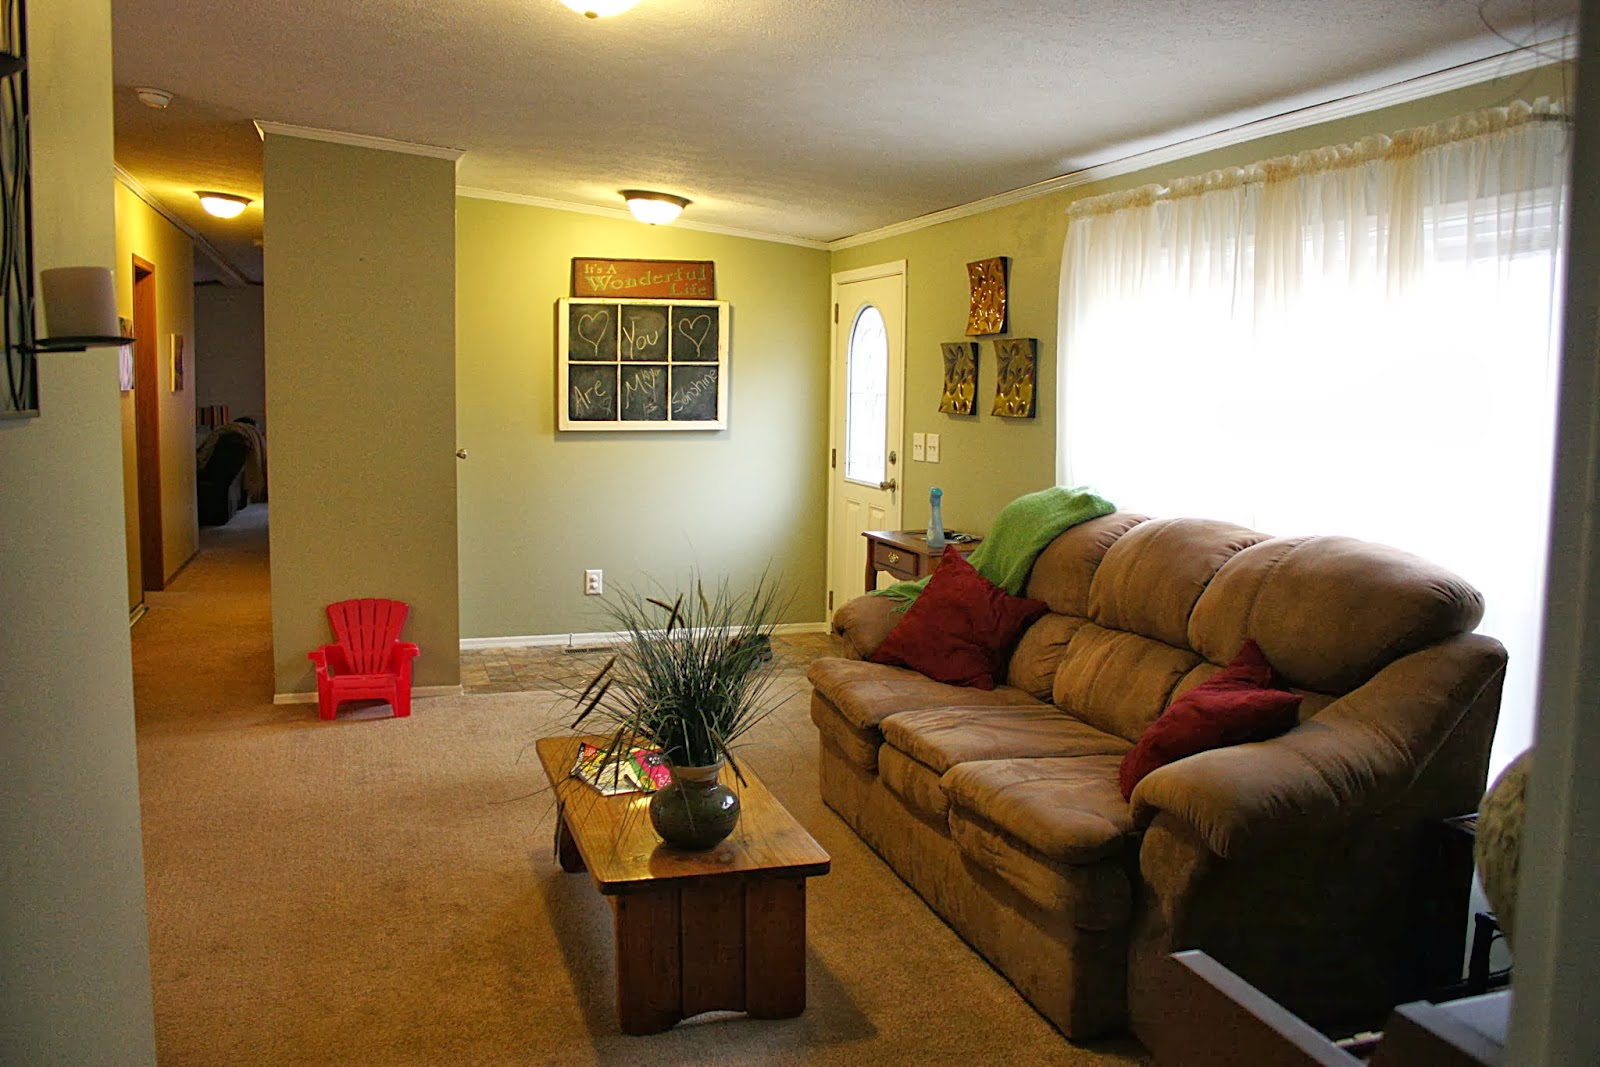
I decided to start at one end of the house and work my way across.  Our master bedroom was already painted, so the next room was the front living room.  This is the room you enter when coming through the front door.  Here is a picture of it before with the orangey trim.


And here's a picture with the newly painted trim.


It's sooo much brighter and makes the space feel bigger.  Since I was going through the process of updating this space, I decided it was time for a curtain upgrade.  

When we first moved into our house, we concentrated most of our money on things like furniture instead of things like curtains and decorations.  I just went to Walmart and picked out the cheapest curtains I could find to cover the windows.  I think these sheers were $4 per panel.  What I didn't know at the time was that I could make my own for the same price.  Thank goodness for Pinterest :)

Here are a few more pictures of the old curtains.  They were on the cheap white rods that came with our house.  Of course, these curtains were never my favorite, but they never really bothered me until I painted the trim.  The curtains are cream and once I painted the trim white, it just made them look dirty.


First thing I needed to replace was that rod.  You can really get into some expense with curtain rods.  I had this rod in my office and decided it would be of better use here in the living room.  


It was chrome, but I wanted oil rubbed bronze, so out came the spray paint.


To replace the curtains, I just wanted white cotton.  Nothing fancy, just simple and bright.  I didn't want to spend much, so I decided to make them out of sheets.  One flat twin sheet will make two panels.  I got this sheet from Walmart for $4.


First, I made sure the sheet was folded exactly in the middle and ironed it to make a clean line.  Then I cut along that line to make it into two panels.


Khloe was walking on the sheets the whole time I was trying to cut them and I couldn't resist taking a picture of her chunky little foot :)


Since I cut down the middle, the panels were already hemmed on one side, so the only thing I had to do was hem the other side.  I did this to two sheets, because I needed three panels.

Instead of putting the rod through the curtains, I bought curtain clips from Target.  I had enough for 4 clips per panel.  I spaced them evenly across each panel.


And here is the end result.  :)


Photo bomb by Khloe...


And here's a before and after.


It's definitely brightening up around here.

So, total cost of the new curtains-

(2) flat sheets- $4 each= $8
(2) packs curtain clips- $4 each (on clearance at Target)= $8
Curtain rod- already owned
Total= $16!  

-Brooke

My blog has moved!

You should be automatically redirected in 6 seconds. If not, visit
www.lifeonagravelroad.com
and update your bookmarks.