Showing posts with label DIY. Show all posts

Tuesday, January 13, 2015

DIY Kid's Art Center

I hope everyone had a great Christmas and New Years.  Our's was amazing.  Khloe is at the perfect Christmas age right now- she loves lights, presents, snow, Santa.... pretty much anything that has to do with Christmas.  I hope this stage lasts a long time.  Nothing is better than viewing Christmas through the eyes of an excited child.

It's back to work for us and I'm having a really hard time getting out of holiday mode.  I had the opportunity to stay home with Khloe the entire week of Christmas this year.  We made crafts, baked cookies, watched Christmas movies, played dolls... everything that I could think of.  Anyways, it's hard to come down off a week like that and go back normal everyday responsibilities.  But, I'm trying.

We started a Christmas tradition last year of making Khloe a homemade gift.  I love the idea of putting a lot of effort into something for my child.  Last year we made her play kitchen.  You can read about that by clicking the link below.


I spent a lot of time this year on Pinterest trying to find the perfect gift to make.  Khloe loves drawing, coloring, stickers and crafts, so I decided to make her an art center.  Plus that would give me a way of organizing all those coloring books!  2 birds- 1 stone.


I started out with this little table my dad had given me.  He's always looking for stuff I can use :)


The leaves on the table made me a bit nervous- didn't want any pinched little fingers- and the decorative side panels weren't really my thing.  A few screws later and they were gone.  


I painted the table white using the Rustoleum Cabinet Transformations that I had leftover from painting my cabinets (Kitchen Re-do In Progress).  Same as always with this stuff, it took about 4 coats.

Sorry for the lack of in-progress pictures, it was the week of Christmas and I was struggling to get everything done.

I then painted pink stripes on the table.  Just measured it out and put down some painters tape. I wanted to match up the pink paint to the little Ikea stools that I bought, so I took a leg of one of the stools to Lowe's and matched it up.  I ended up going with Olympic Panama Rose in semi-gloss.  It matched up perfectly.


For the legs, I wanted to add a little pizzazz and since it was an art table, dripped paint legs seemed like a smart bet.  Fair warning- this is NOT a 1 person job. 

First I wrapped the top of the table in wrapping paper to protect it.  Then I poured pink paint into 4 styrofoam cups.  I put the cups to the left of each leg so we could pick up the entire table and move it over to go down in the cups.  After dipping the legs, Chris lifted the table and I quickly removed the cups.  We then quickly turned the table over to let the paint drip down the legs and dry.  It was nerve- wracking, especially since we had to do it inside due to the cold.  I had drop cloths everywhere!  I absolutely love the finished legs.  I think it's so cool to have paint dripping down an art table.


We set up the table on Christmas Eve night in her room after she went to bed and showed it to her in the morning.  I said "Khloe, now you can color whenever you want!"  Her response was, "And eat pizza!"  She's always making us laugh. This picture was Christmas morning.  She sat down and started coloring right away.


To finish off the desk, we put 2 spice racks above it to hold her coloring books, 2 Ikea stools (so she can have friends over), and three buckets on top to hold her crayons, markers and colored pencils.

Here is a link to the stools-  MAMMUT stools. They're only $7.99 each and they are crazy sturdy (my husband and I both sit on them regularly to color).
Here is a link to the spice racks- BEKVAM spice rack
The little buckets were from Target's dollar spot this summer.


Khloe loves the table.  She colors for at least an hour everyday (no exaggeration). Did you guys make any fun DIY gifts this year?

-Brooke

Linking up to:


Monday, November 3, 2014

$3 DIY Tiered Cake Plate

This post is LONG overdue.  I was cleaning up my SD cards and found these pictures, so I decided it was time to share.  


I made this cake plate for Khloe's 1st birthday party back in September 2013.  I needed two tiered cake plates for my table arrangement and I wasn't about to pay $30 each for them.  So, I was in Dollar Tree looking around one day and the idea struck me.  I could take two plates and a vase and make a cake plate!  I love it when the stars align.  

I chose 1 large round platter...


1 smaller platter...


 And 1 skinny, single rose vase. I chose a sturdier one, not a glass one.  


They were all kinds of mismatched, but it didn't matter.  

I used Gorilla glue to attached together.  Large platter on bottom, vase in the middle and smaller platter on top.


After the glue was dry, I spray painted the whole thing white to make everything cohesive.

I used these cake plates for Khloe's birthday party last year and again this year.  I couldn't be happier with them.  


So, as far as pricing goes-

Large platter: $1
Small platter: $1
Vase: $1
Gorilla Glue & spray paint: already owned

Grand total: $3

-Brooke


Friday, October 31, 2014

Trick or Treat

Happy Halloween!  I don't know about where you are, but here is Motown, WV, it's cold and rainy (on the verge of icy and snowy).  I'm glad our trick or treat was last night.  

This year, Khloe went as Molly from the Bubble Guppies.  I looked around for a costume to buy, but I couldn't find one Molly costume in her size.  So, I decided to give it a go at making one.  Here is our inspiration pic.


Isn't she a cutie!  By the way, I'm that pathetic parent who knows more Bubble Guppies songs than top 40 songs.... yep, I own it when I'm singing "Take me away on a train!"

I started out trying to find a skin-colored shirt for the base of the top.  No luck.  Kid's clothes just don't come in tan.  I improvised and bought white onesies and dyed one tan by using RIT dye.

You use this dye in your washing machine, scared me to death the first time I did it.  I thought I was going to ruin the washer.


But if you follow the directions on the back, you come out with a clean washer and a tan shirt.


Then came the skirt.  I am no seamstress, so I really don't even know how to give a tutorial on this.  I bought some fleece fabric (any stretchy fabric would work) and made a straight skirt.  I basically wrapped the fleece around her, cut it, sewed a straight seam down the back and added a piece of elastic at the top to hold it up.  Then I made a tutu out of bunched up tulle and sewed it on the bottom of the skirt.  This was the hardest part because the tulle wasn't exactly easy to get through my machine.


Next, I cut random pieces of darker blue felt and attached them to the front of the skirt with fabric glue.


I wrapped a piece of tulle around Khloe's chest to finish the top and put a pink wig on her and it was done.


She was hating the wig in these pictures.  I really wanted her to wear the wig, so I told her she would get more candy if she wore it and she ended up wearing it the whole time she was trick or treating.  Mom- 1, Khloe- 0!

This costume was pretty cheap to do, here's a breakdown of the costs.  i already owned the thread and glue.

T-shirt: $2.50
RIT dye: $2.50
Fleece remnant: $1.98
Felt: $0.23
Tulle: $2.00
Wig: $5.00

Total: $14.21


Did you guys DIY any costumes this year?

-Brooke

Saturday, October 25, 2014

DIY Window Clings

We're in full Fall mode around here... even on the health front.  We keep passing colds back and forth, so as I write this, I'm shivering under 2 blankets. Ugh.

So, the name of the game when it comes to toddler crafts is simplicity.  Last week we made these window clings out of Elmer's glue and it was so easy.


Basically, you take some half empty bottles of Elmer's glue...


Add some food coloring and shake it up....


Print out a coloring page or template of whatever you want.  Put a piece of plastic on top (a report cover works great)...


Paint on top of the plastic and let them dry completely.


And, tada!


Khloe was a bit too young to draw out the leaves, she ended up just making lines and circles.  But she loved putting them on the windows.  Now to find our next craft idea!  :)

-Brooke

Wednesday, September 24, 2014

Spoons

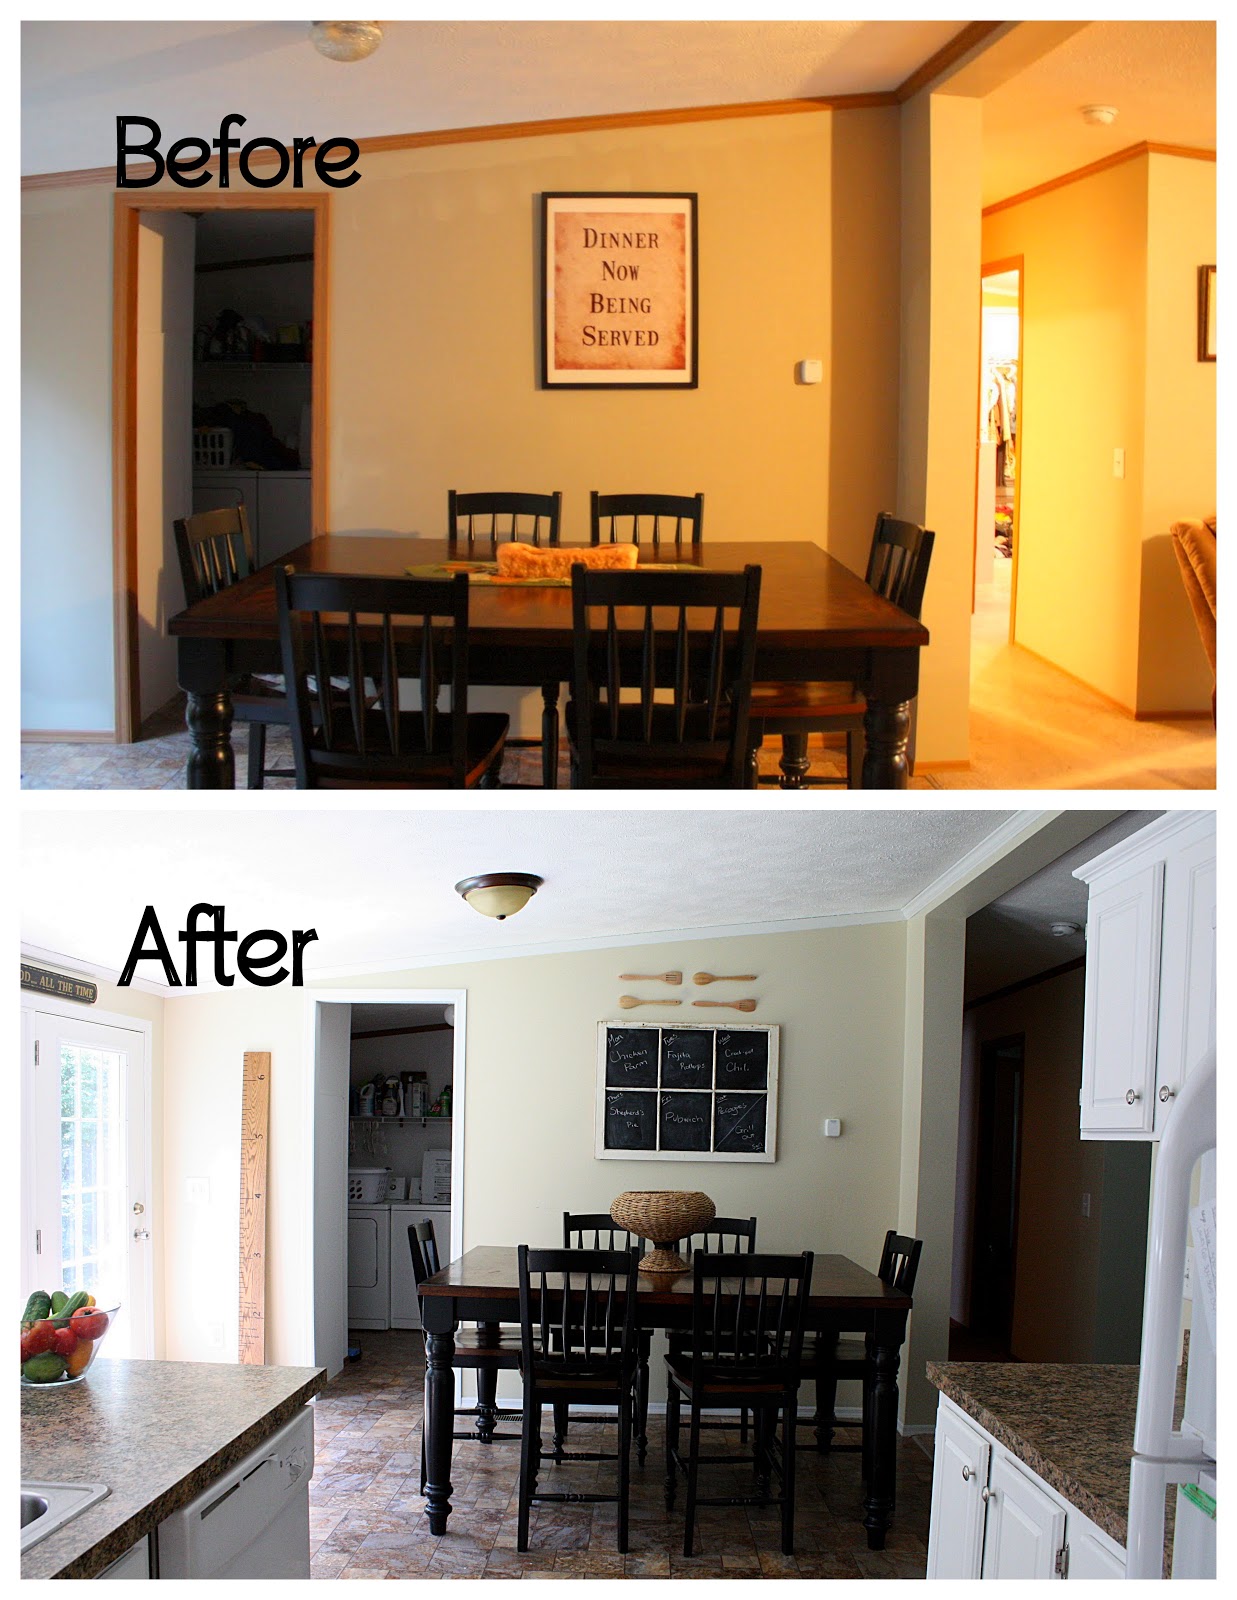
Every since my kitchen update started here, I've been struggling with what to put on the walls.  It seems like whenever I try to decorate my walls, my scale is all wrong.  I need to go bigger.  I always think something looks big until I put it on the wall and then it's dwarfed.  So with the phrase rolling around in my head "GO BIG OR GO HOME" I started mad Pinteresting to find something for the big blank dining room wall.  Here's a before shot.


Holy moly that was a long time ago.  See what I mean about the scale?  The picture frame looked huge when it was sitting on the floor, but once I put it up.... it's Bilbo Baggins (Mom, that's a Hobbit movie reference, you won't get it).

Since I was already re-arranging things in the living room, I decided to steal my window chalkboard that was in the entry.  It left the entry empty, but I've got plans for that.  The window was big enough, but I still wanted to add a little pizzazz to the top.  Inspiration hit and I decided on wooden spoons.  Plain old regular size wooden spoons from TJ Maxx.  I didn't know if it would work, so I bought them with all intentions of not liking it and just throwing them in my spoon drawer.  After putting them up with my trusty Command Strips, I really liked them.


 I'm playing around with the idea of painting them, but for now I'm kind of digging the neutral vibe.  Here's a little pro (yeah right) Photoshopping to show what it may look like if I painted them fun colors.


I'm not sold.  Pretty sure I'm going to leave them neutral.

Here's a wide shot of the dining room side of the kitchen.


Here you can see the open space where there should be a door to the laundry room.  Yeah, that's a funny story I'll tell you at another time.  You can also see my DIY ruler growth chart that I'm waiting on my wonderful husband to hang.

It's amazing what some paint and new things on the wall can do for a room.


-Brooke

Saturday, September 6, 2014

DIY Rustic Fall Wreath

Is it just me or have they started putting mums out WAY early this year?  Not that I mind, I love Fall.  I love the colors, the feel of the air turning crisp, the smell, the pumpkins.... you get the idea.  Also, what's up with this September?  It has been so HOT!  It's time to start cooling off... come on!

So, the Fall bug hit me early this year.  I've already broke out the pumpkin spice candles, started baking like a maniac and made a wreath.  I refuse to pay $40 for a wreath that I don't even really like, so I used what I had and made one that I love.


Here are my materials.


-foam circle (from Dollar Tree)
-sticks
-burlap
-raffia
-old t-shirt
-hot glue and gun

This was so simple to make.  It only took about 10 minutes.

First, I wrapped the foam circle in burlap, hot gluing the end to secure.  Then I broke the sticks to around the same length and stuck them in the foam all along the edges.  Most were pretty secure, but I hot glued any that felt loose.

I then made flowers out of the old t-shirt.  I roughly followed the tutorial here.


Hot glued the flowers on and hung with the raffia.  That's it!  Now I have a custom wreath that matches the rusticness (is that a word??) of my porch.


All in all, the wreath cost me $1.  I had everything except the foam circle.  Not bad, not bad at all.

-Brooke

Linking up to The 36th AVENUE.
The 36th Avenue

Tuesday, July 15, 2014

Khloe's Monthly Photo Project & Photo Book

Way back when in this post, I talked about Khloe's monthly photo project.  I showed a few months of her photos, but never got around to showing the final project.  I took a picture of her every month and kept track of milestones throughout the year.  Then for her birthday, I made her a photo book called "Khloe's 1st Year".  


The pages were laid out with the picture on the left side, labeled with the month, and a paragraph on the right with a blurb about what she did that month.


I tried to take a picture of every page so you could see what each said.  Some are crooked and a bit distorted... just ignore it :)  Click on the pictures to make them a bit bigger.


I was really pleased with the book and everyone loved looking at it at her birthday party. I decided to continue on into her second year.  I've been taking monthly pictures, but I'm not sure yet what I'm going to do on the right side page.  Thinking about maybe funny stories or things she says. 

Here are the pictures so far for this year.  

September (with birthday cake of course)

October (we just so happened to have puppies!!)

November

December

January

February

March

 April

May

June

 July
 

I wonder if she'll get annoyed with me when she's 16 and I'm still doing this..... 

-Brooke

My blog has moved!

You should be automatically redirected in 6 seconds. If not, visit
www.lifeonagravelroad.com
and update your bookmarks.